Import Purchase Orders
You create purchase orders in your accounting software — Tally, QuickBooks, Zoho Books, or whichever system your company uses. Trackod picks up from there.
When you import a purchase order into Trackod, the system reads your files and pulls in the details automatically. Vendor information, delivery address, line items — everything is captured without re-typing. You review the details, choose how to send the order to your vendor, and you're done.
In this section, you will learn:
- What files you need before importing
- How to upload and review your purchase order
- How to send the order to your vendor
- What happens after import
Before You Import
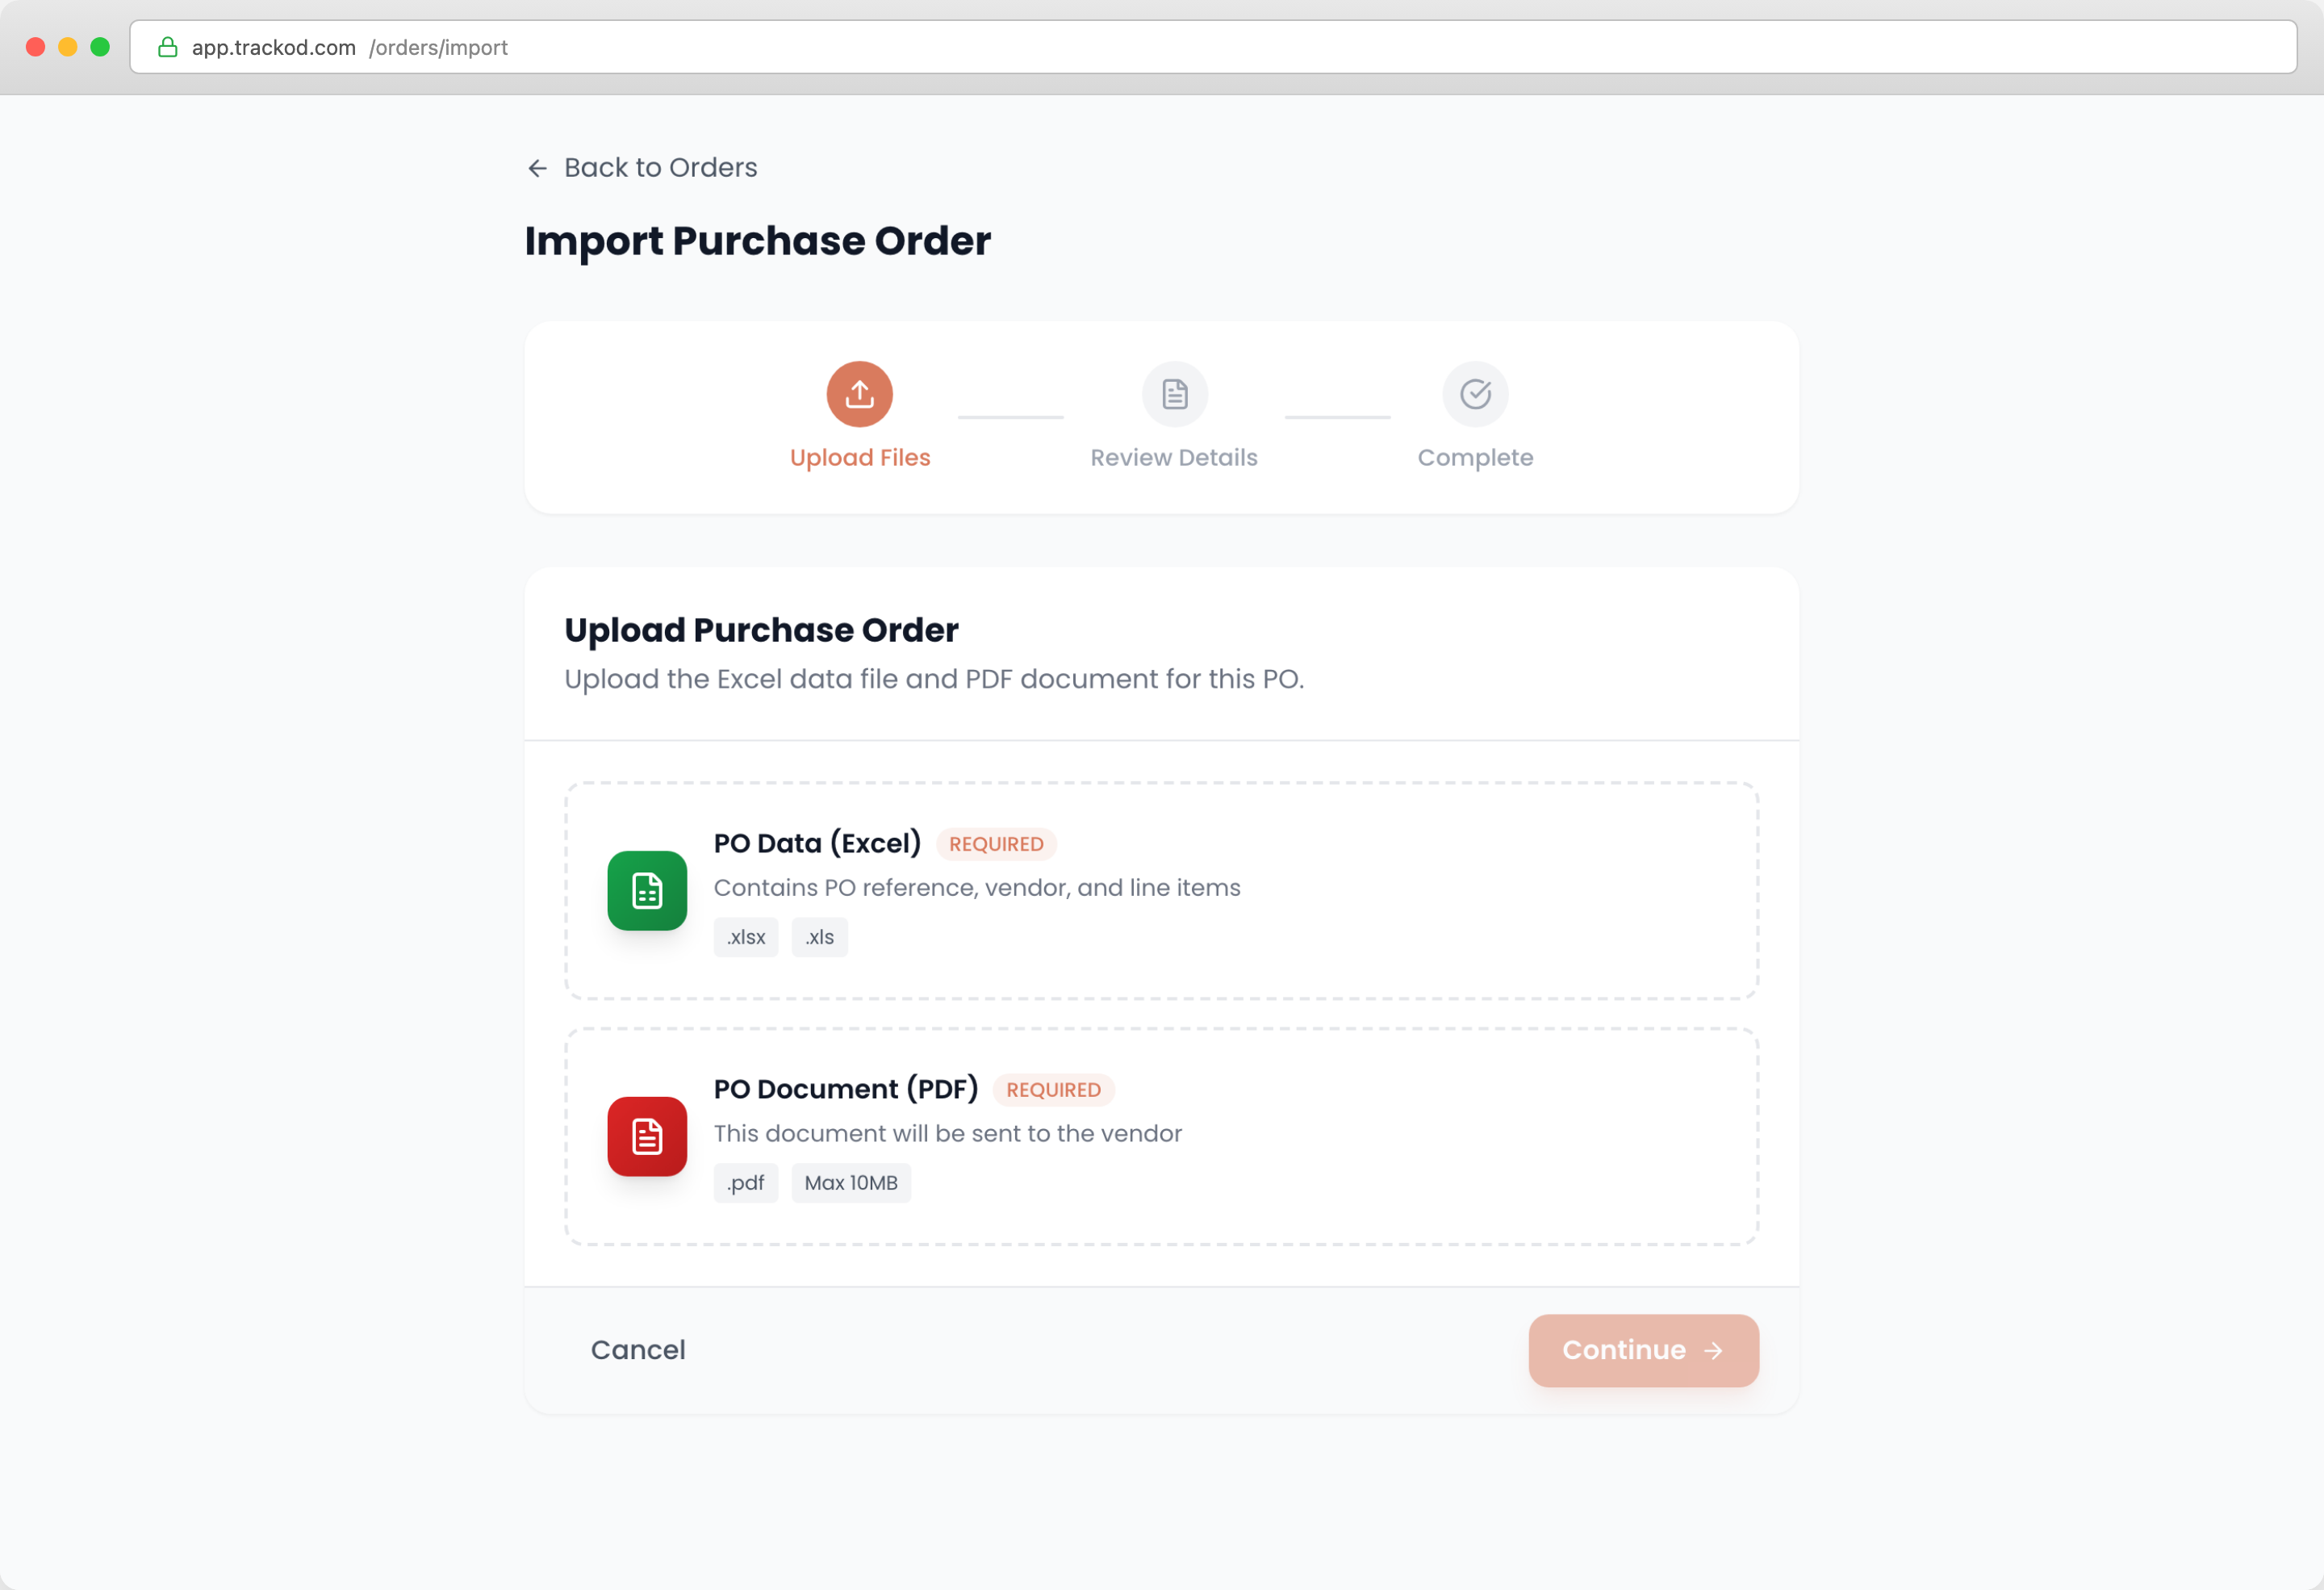
To import a purchase order, you need two files from your accounting software:
| File | What it contains |
|---|---|
| Excel file | Order data — vendor details, delivery address, line items, quantities, rates |
| PDF file | The purchase order document (attached to vendor email if you send via Trackod) |
Both files are required.
Export these files from your accounting software before you begin. If any details need correction — a wrong phone number, a different delivery address — you can edit them during the import process.
The Import Process
Importing a purchase order takes three steps: upload your files, review the details, and confirm.
Step 1: Upload Files
Step 2: Review Details
Trackod reads your Excel file and displays the order information. Review what was pulled in:
- Vendor information — company name, email, phone
- Delivery details — address, site contact
- Line items — descriptions, quantities, rates, amounts
- Expected delivery date
If anything needs correction, edit it directly on this screen.
Choosing How to Send the Order
You need to decide how to notify your vendor about this order. Choose one of three options:
| Option | What happens |
|---|---|
| Send purchase order + tracking link | Trackod emails the vendor with the PDF attached and a link to view and update the order |
| Send tracking link only | Trackod emails just the tracking link — use this if you already sent the purchase order yourself |
| Don't send now | Nothing is sent — you will contact the vendor yourself and share the link later |
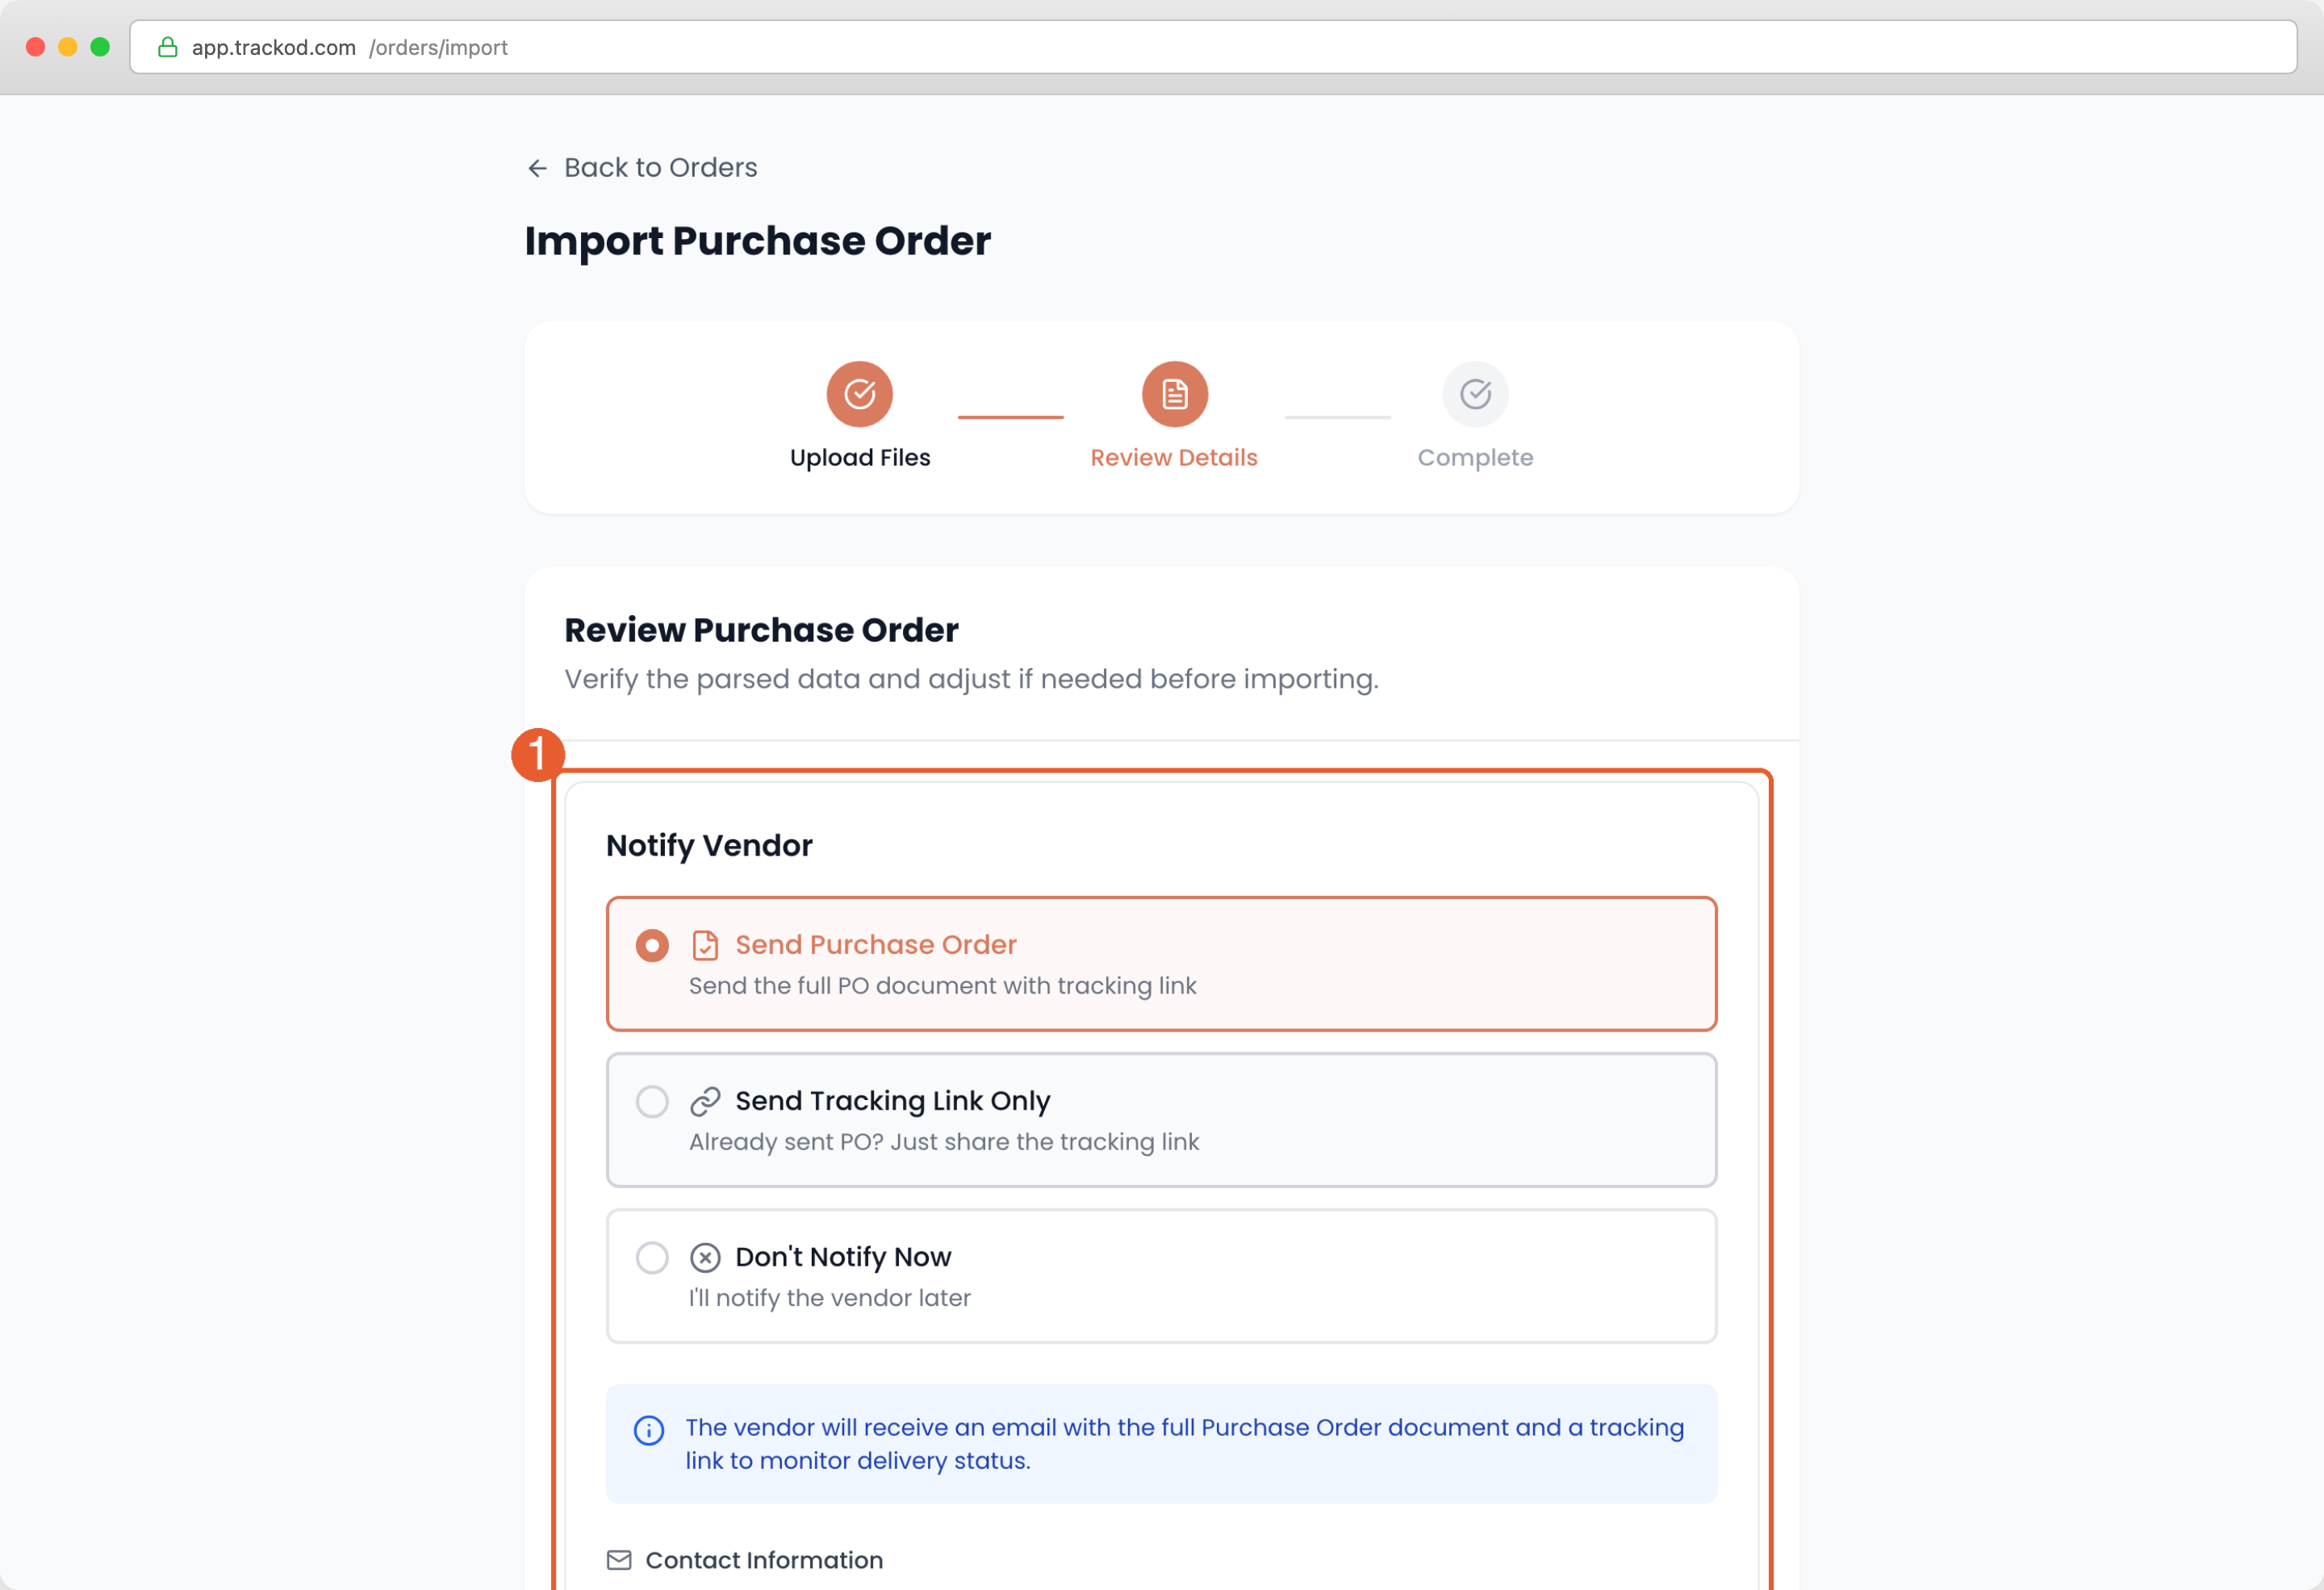
If you choose one of the first two options, the vendor's email address is required. Make sure the email is correct before proceeding.
Setting the Expected Delivery Date
This field is required. Set the date when you expect the order to arrive. Trackod uses this to identify overdue orders in the Action Queue.
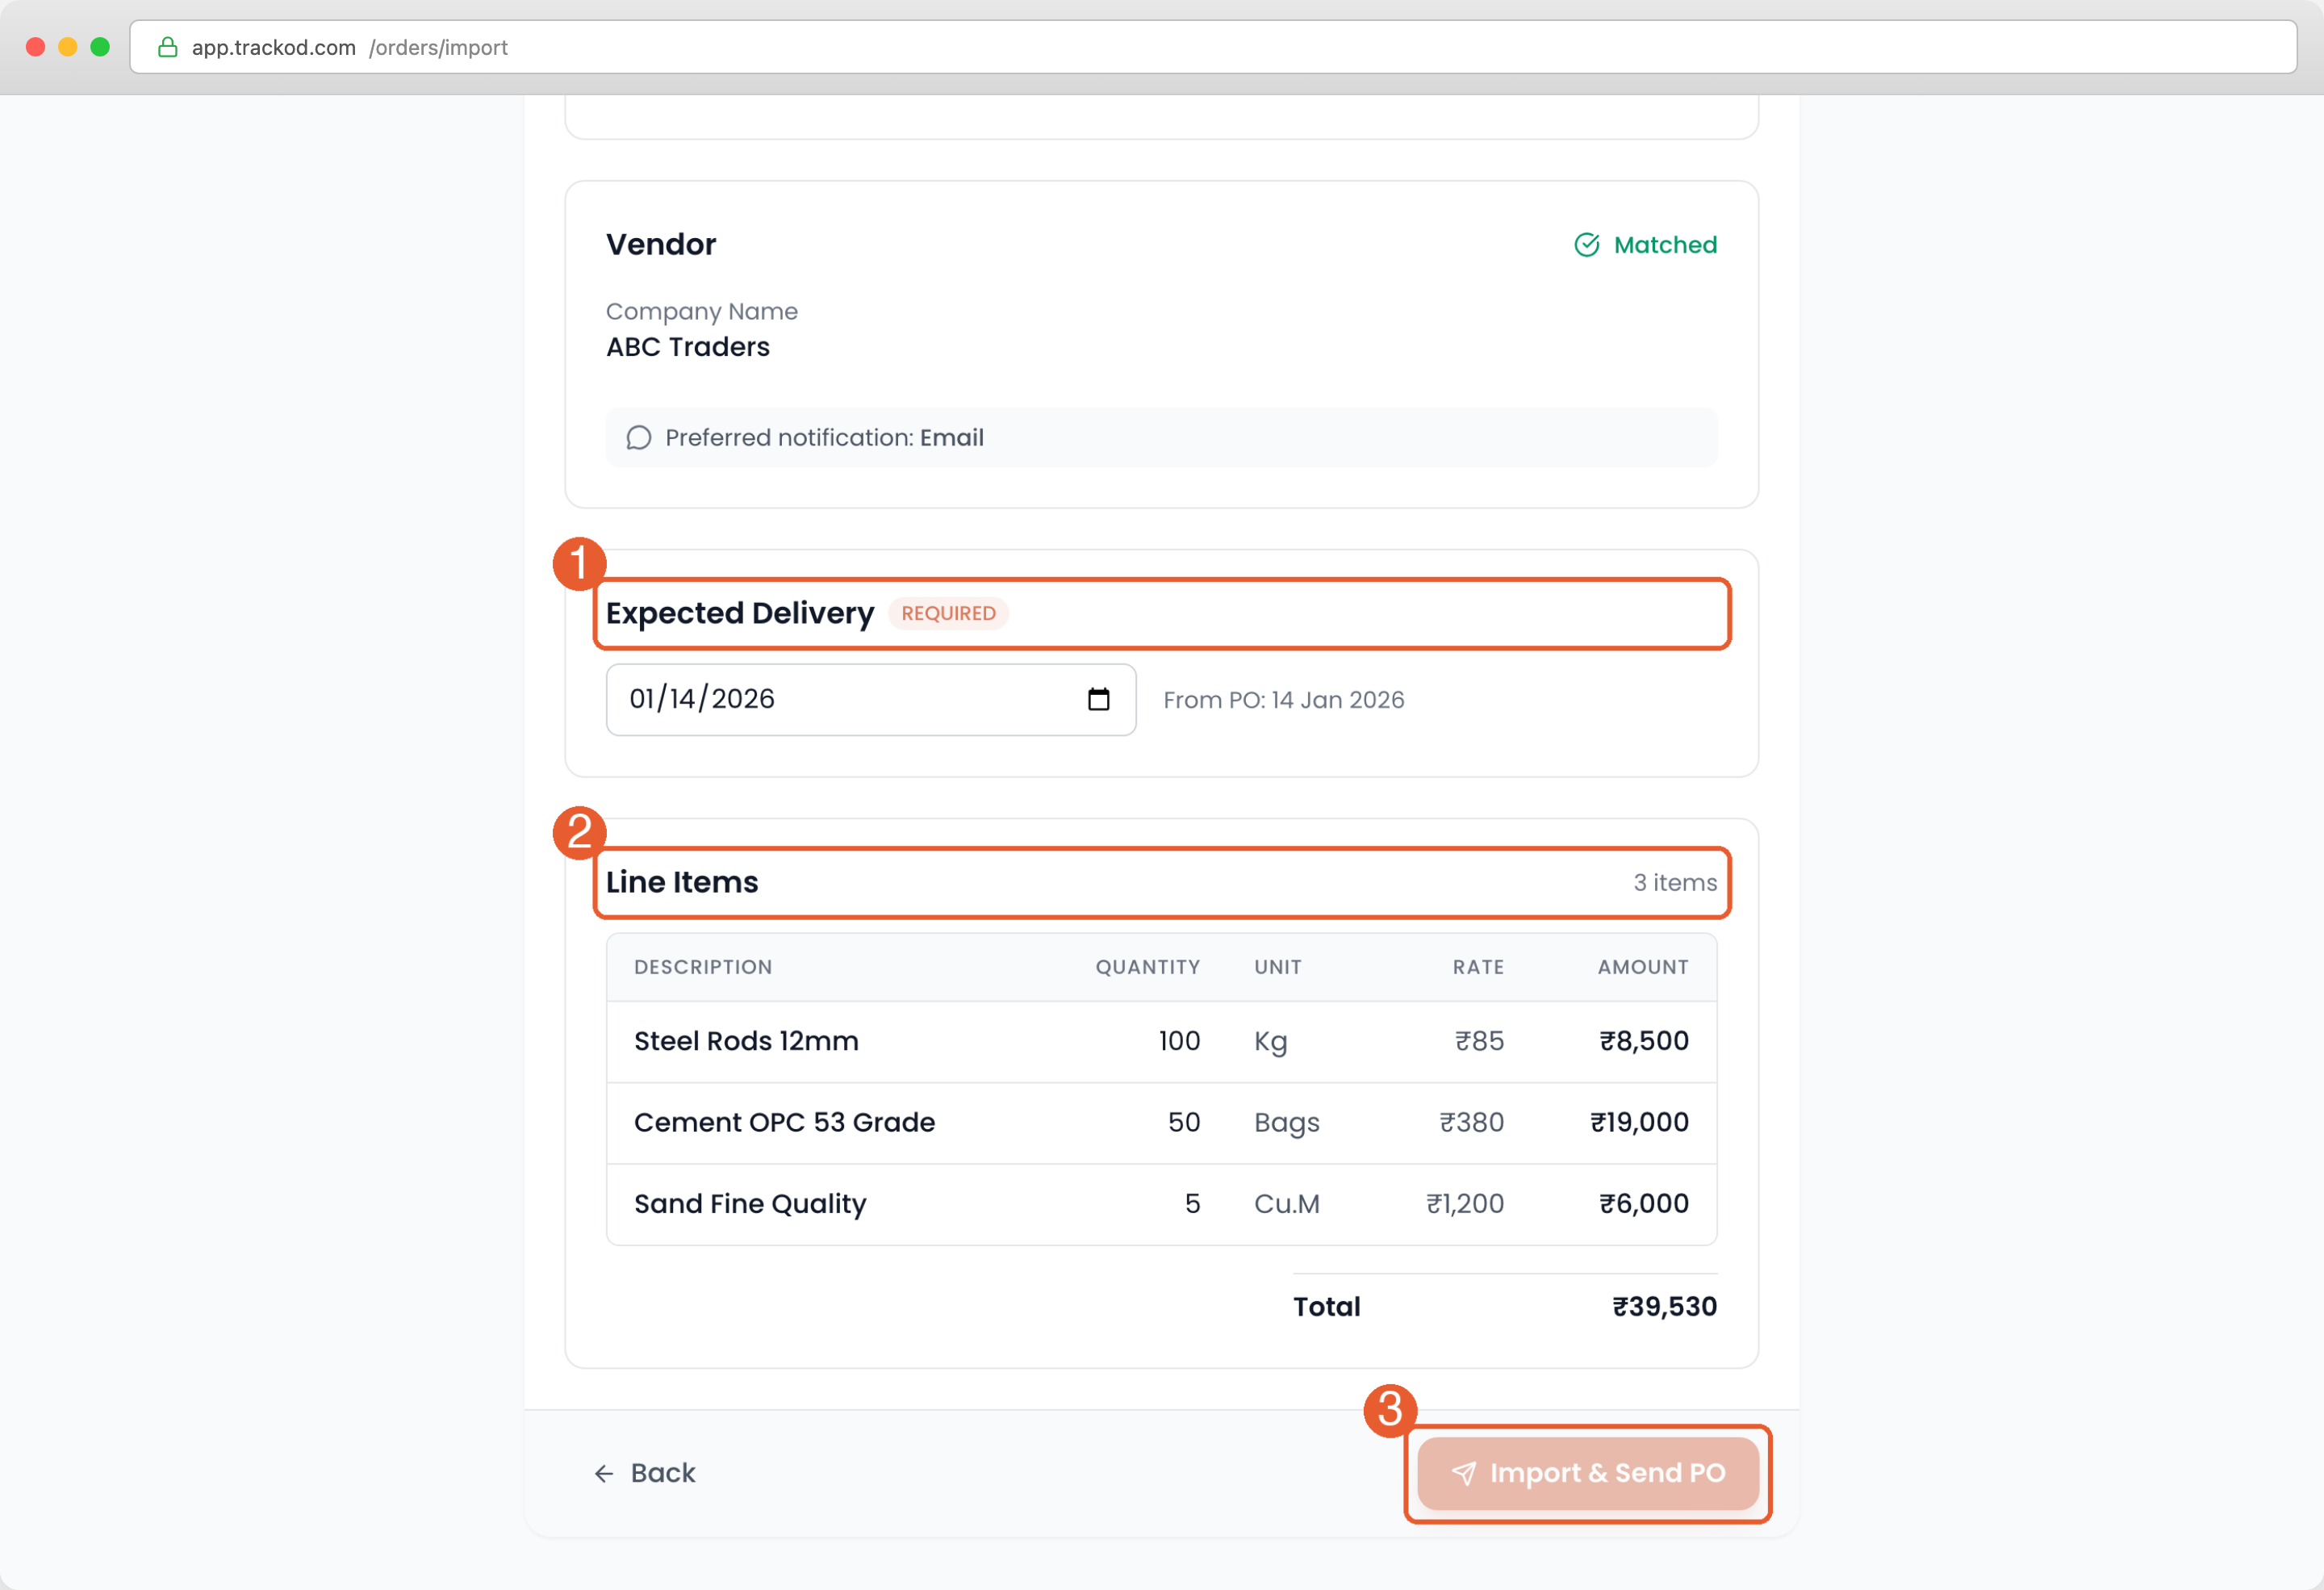
Review Line Items
The line items table shows all items from the purchase order. Verify that the descriptions, quantities, and amounts are correct.
When everything looks correct, click Import & Send PO at the bottom of the screen.
Step 3: Complete
You will see a success message with your order reference number.
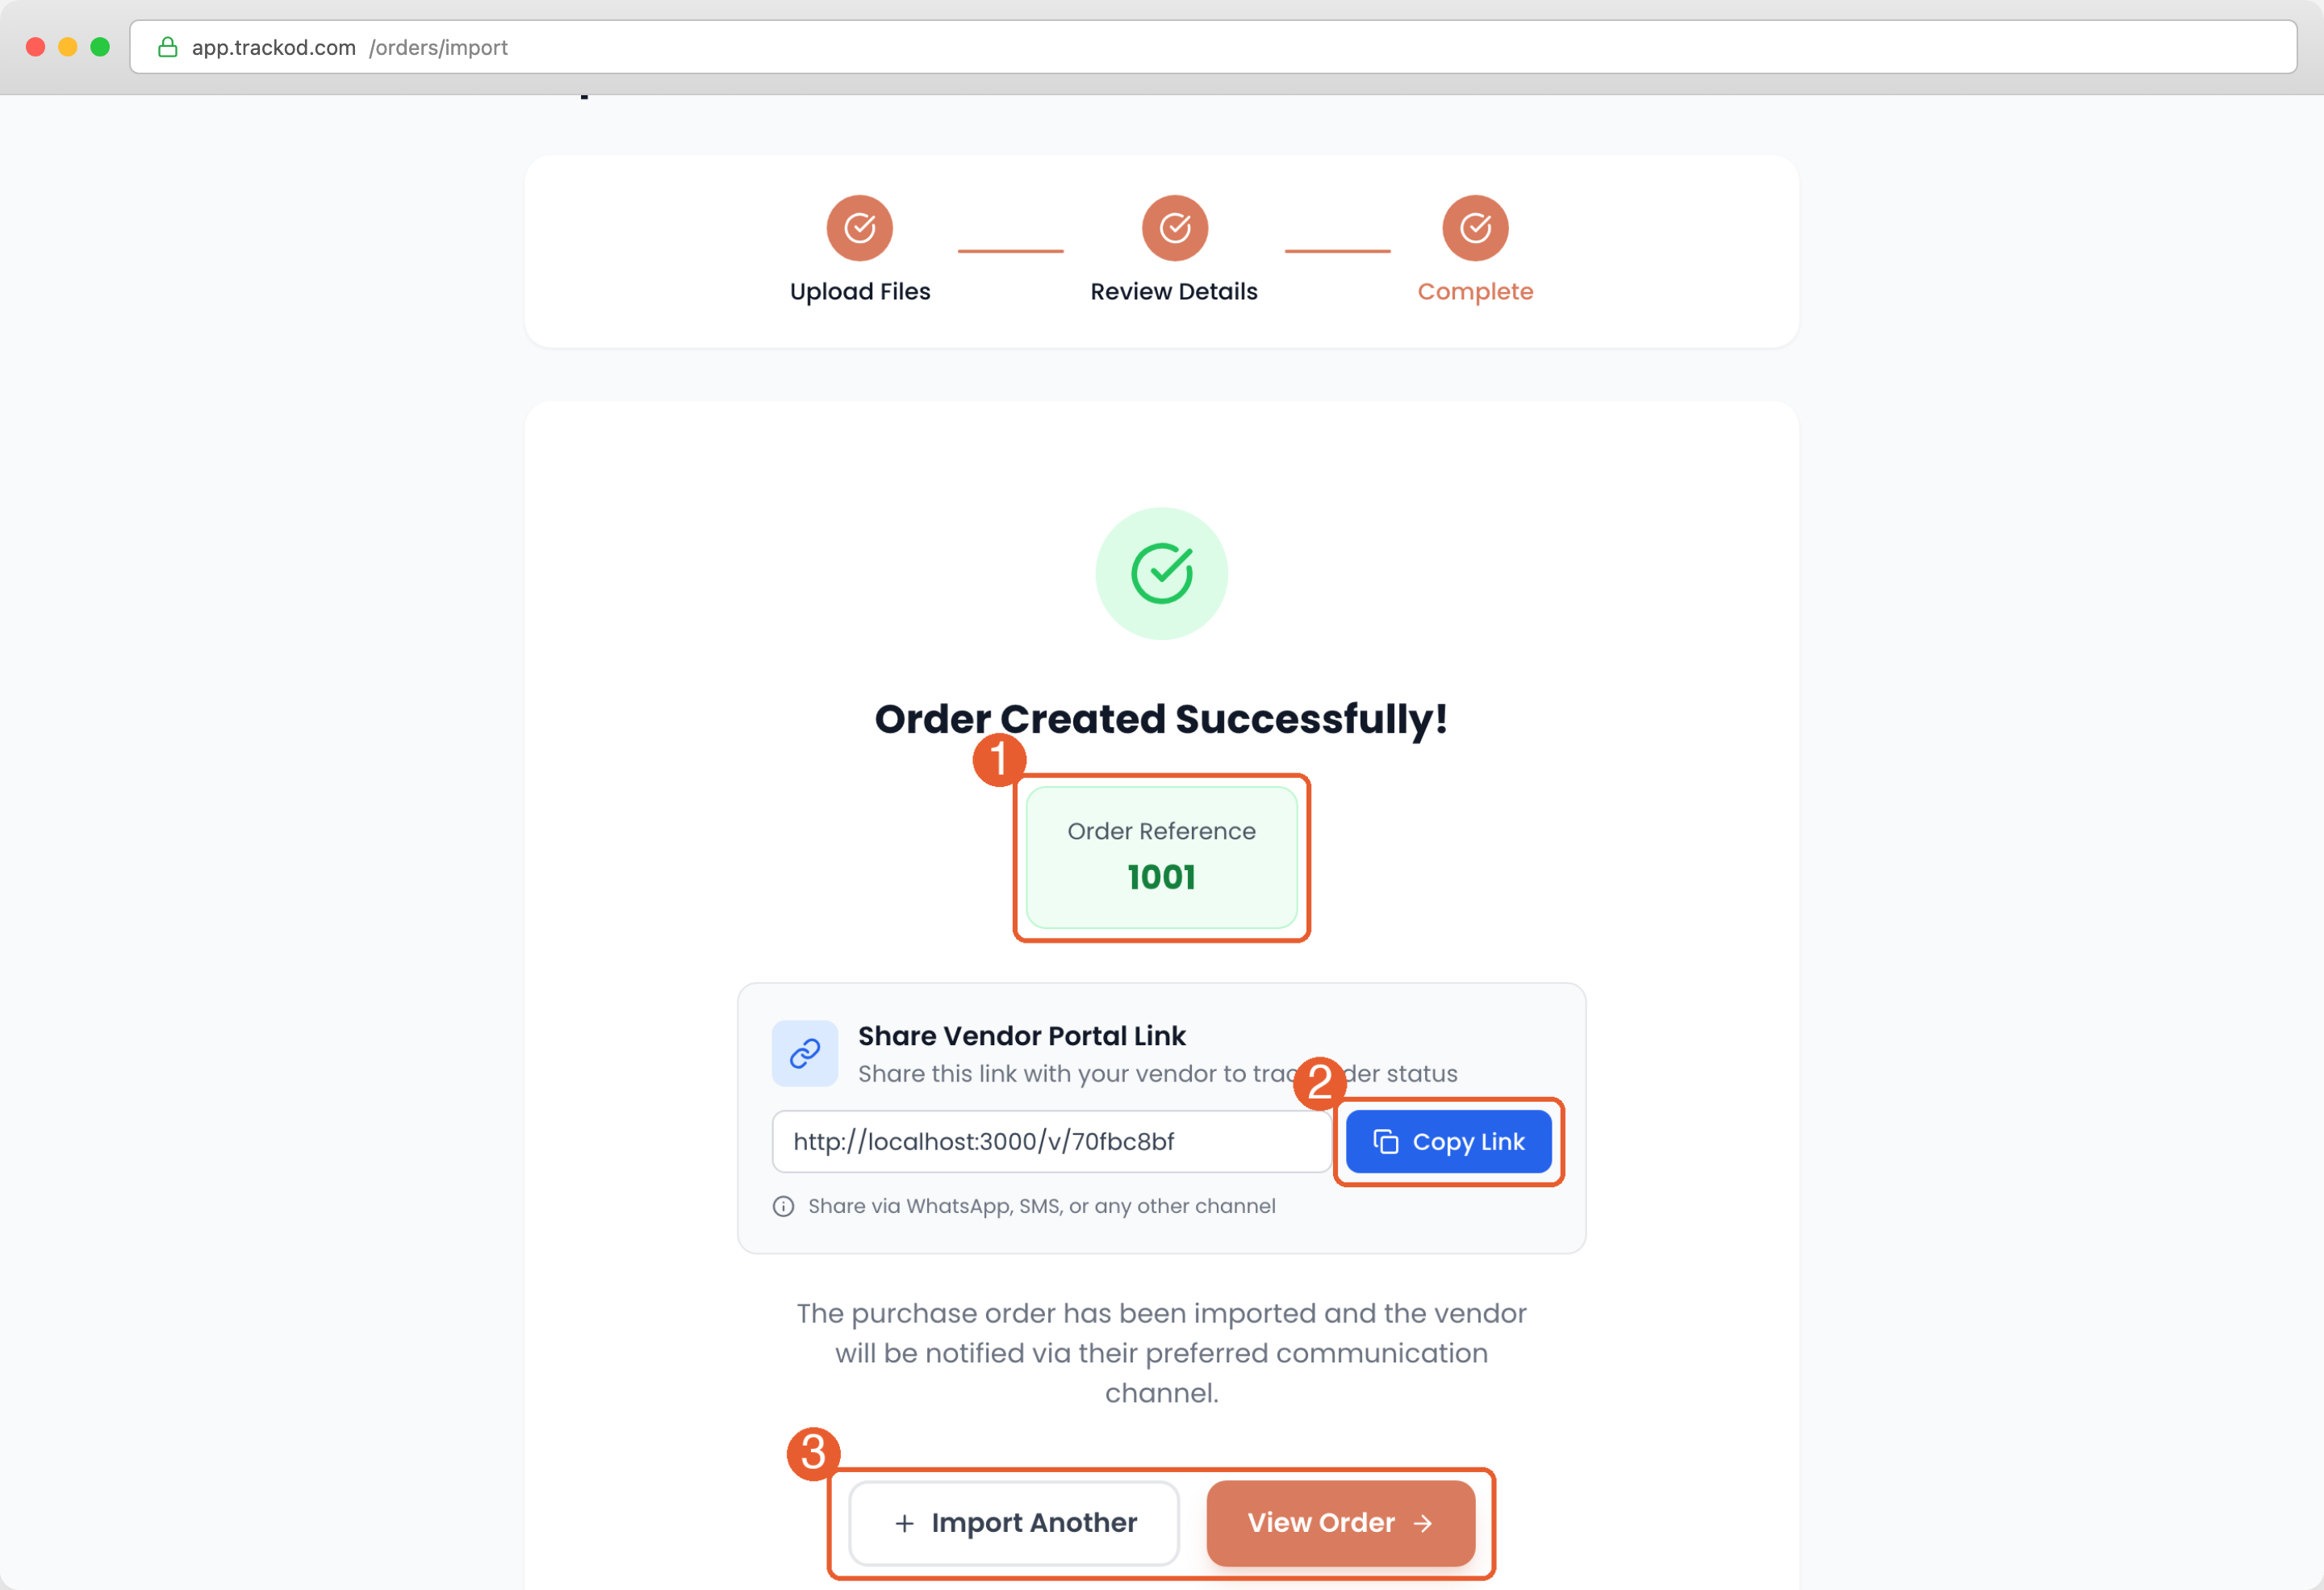
Sharing the Vendor Portal Link
Even if you chose "Don't send now", the success screen gives you a link to share with your vendor. Click Copy Link and send it via WhatsApp, SMS, or any channel you prefer.
When your vendor opens this link, they can view the order details and update its status. Their updates appear in Trackod automatically.
What Happens Next
Your order is now in Trackod. Here is what to expect.
Your Order in the Orders Page
Go to the Orders page to see your imported order. Its status depends on what you chose during import:
| If you chose... | Status will be... |
|---|---|
| Send purchase order + tracking link | Notified |
| Send tracking link only | Notified |
| Don't send now | Pending |
If You Sent via Trackod
Your vendor receives an email with the purchase order and a link to their portal. When they click the link, they can view the order details and update its status — acknowledge the order, provide an expected date, or mark it as dispatched. Their updates appear in Trackod automatically.
If You Chose to Send Yourself
Share the vendor portal link via WhatsApp, SMS, phone, or any channel you prefer. When your vendor opens the link and makes updates, those changes appear in Trackod just the same.
From here, you can import more orders by clicking "Import Another" from the success screen, or go to the Orders page to monitor progress, send reminders, and manage your orders day-to-day.
What's Next
Now that you know how to import orders, the next section covers how to use Trackod for daily order management.
Continue to Daily Order Management to learn about the Orders page and Order Details page.